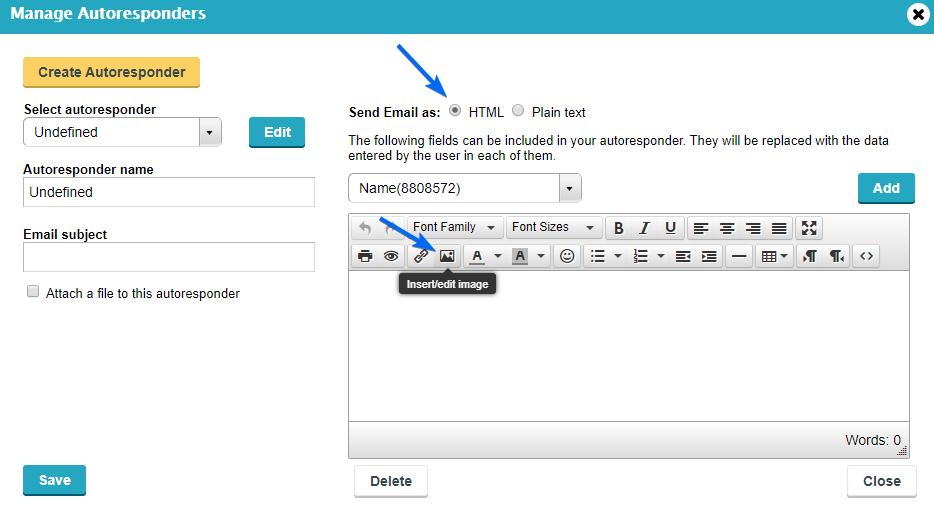
If you’re using the default template, you’ll need to create a new template in order to be able to include images in the notification email or autoresponder. As both the notification email and autoresponder are similarly set, we will show you in this tutorial how to include an image in the autoresponder.
Follow the steps below to successfully add an image in the autoresponder of your online form.
1. Open your email template and go to the toolbar and click on the add image sign. Next, choose the Image option.

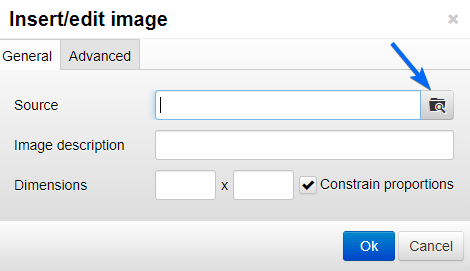
2. In the popup window, click the Source icon and pick the image from your local device. Change its size in Dimensions according to your needs. You can even maintain its proportions when changing its size by ticking the Constrain proportions option.

3. You can add alt text and title to your image.
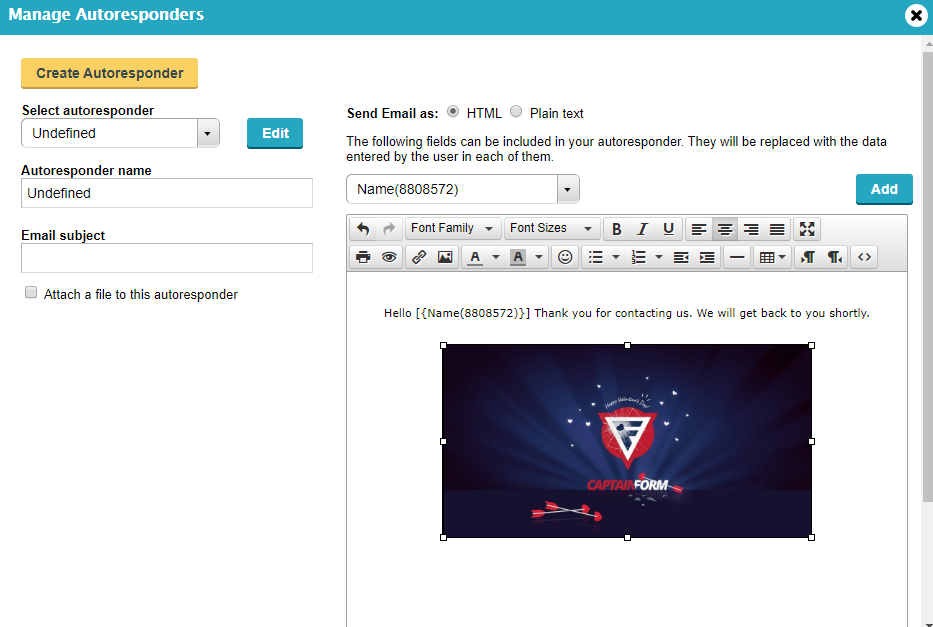
4. Click on Ok and you will see the image displayed in your email. Save your template and that’s about it. From now on, the image will appear in the email content.

You can add more than one image to the same email template. Just repeat the steps above and include as many images as you desire.
